Basic Settings
After installing your template, you'll need to configure some basic settings to customize it for your blog.
This guide will walk you through the essential settings you should configure after installing your template.
Accessing Template Settings
To access the template settings, follow these steps:
- Log in to your Blogger account
- Go to your blog's dashboard
- Click on "Theme" in the left sidebar
- Click on "Customize" to access the template designer
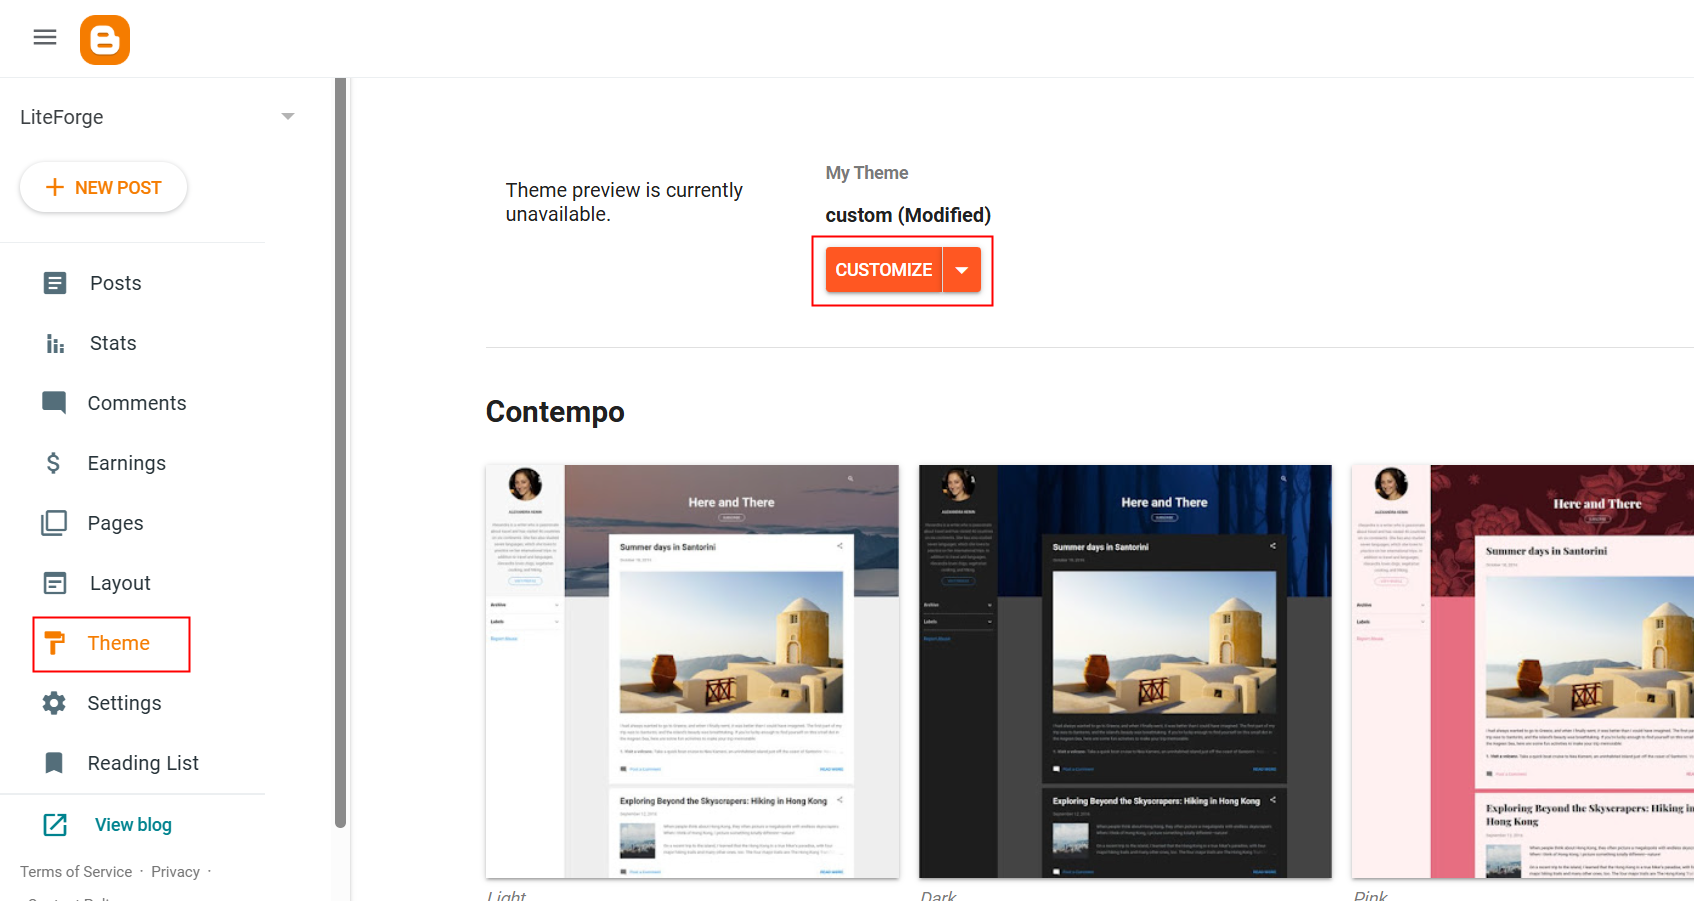
Screenshot: Blogger Template Designer
General Settings
Let's start with the general settings that affect the overall appearance of your blog:
Logo Setup
Your logo is one of the most important elements of your blog's identity. Here's how to set it up:
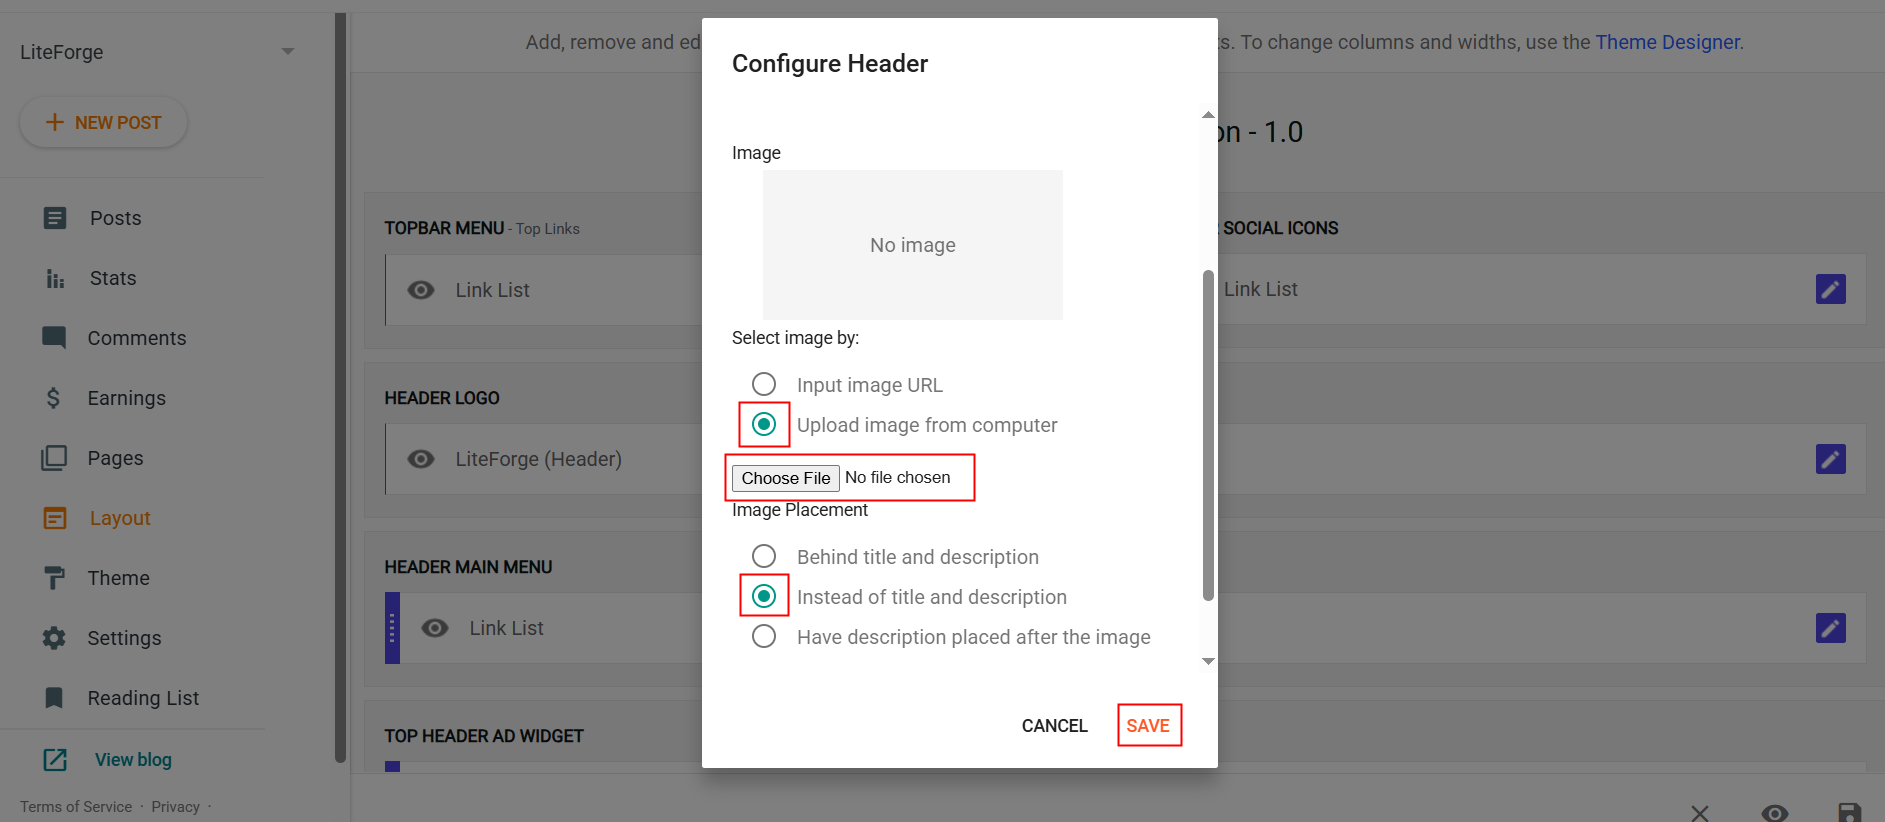
- Click on "Layout" in the left sidebar
- Look for the "Header Logo" section
- Click "Edit icon" to upload your logo
- Click "Apply to save" to save changes
Tip: For best results, use a logo with a transparent background (PNG format) and dimensions of at least 200x50 pixels.
Color Scheme
Customize the color scheme to match your brand identity:
- Click on "Layout" in the left sidebar.
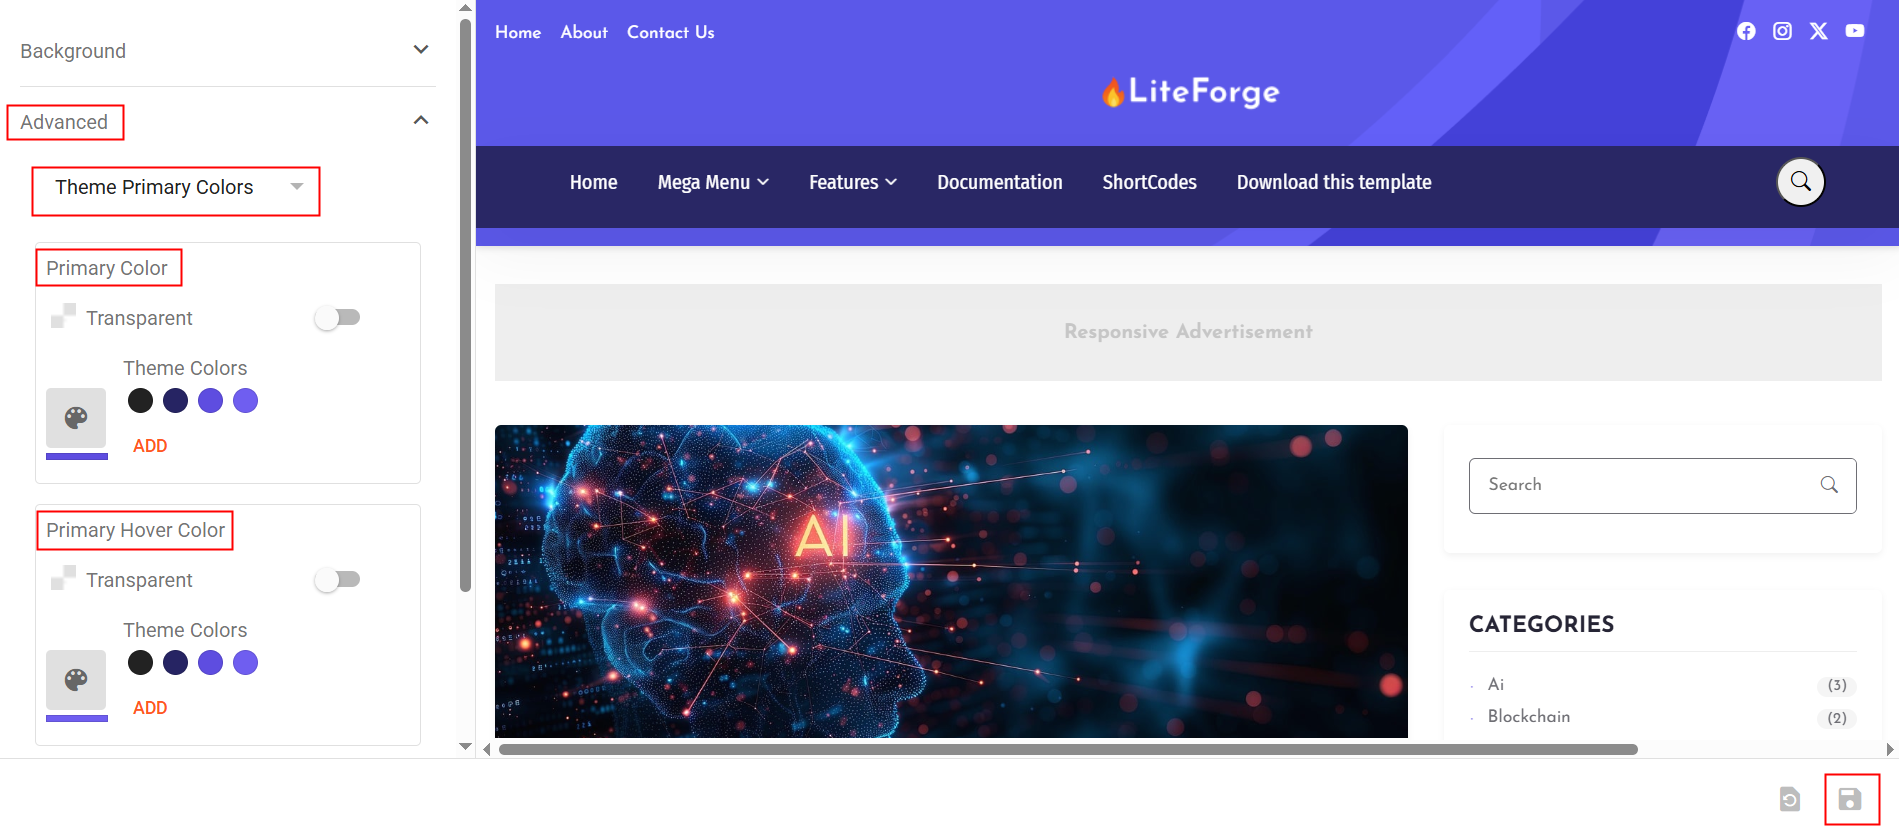
- Look on top "Theme Designer", click on it.
- Click on "Advanced" and then choose "Theme Primary Colors"
- Set Primary Color and Primary Hover Color
- Customize the colors for different elements (header menu background, footer, etc.)
- Click "Apply to save" to save changes
Next Steps
Now that your blog is up and running, you may want to explore some advanced features and customization options:
- SEO Optimization - Improve your blog’s visibility in search engine results.
Congratulations! You've successfully configured the basic settings of your template. If you have any questions or need help, don't hesitate to contact our support team.